Rust removal by electrolysis (revisited) with detailed photos/info
+7
bulldawgdude
Clyde
Grifspop
Tanner
pwmcguire
Hobug
atye
11 posters
Page 1 of 1
 Rust removal by electrolysis (revisited) with detailed photos/info
I have recently tried this myself for the first time and wanted to show everyone how stupidly EASY and CHEAP this is.
pwmcguire has already done one introduction to this process but I wanted to make a more detailed explanation. I think that everyone on here or anyone owning an old car needs to try this. It will save tons of time, energy, and money. No need to sandblast rusty parts. Simply put them in the tank and go to bed, they will be done 18-24hrs later (for most situations). Anyone can do this regardless of your level of technical knowledge or budget!
Here is a before/after scenario using a rusty brake caliper bracket from my 1988 Audi 90 Quattro:
(click all images to enlarge)
Before:

After:

Same part 18hrs later with ZERO scrubbing, no wire brush, no sandblasting... nothing.
Materials used:
• tap water
• baking soda
• battery charger (or car battery and cheap jumper cables)
• plastic tub
• old piece of steel for use as an electrode (I used a broken golf-cart leaf spring)
That's it, nothing else. The size of the part to be cleaned is only limited by the size of the imagination. As long as you can submerge the part, you can do this. I will include a link below to show this in action on a large scale.
How to:
Step #1: Find a tub/bucket large enough to totally submerge your item. Fill with water, add baking soda, and clamp the electrode to the side (so it won't fall and touch the rusty part later by accident)

Step#2:
Attach the battery charger like shown. It is VERY important not to reverse the leads or you will possibly damage the part you are trying to save. Positive goes to the steel electrode (anode) and negative goes to the part itself (cathode).

That's it! Nothing else to do but sit and wait.
Here is what mine looked like after about a minute:

You can sorta see the bubbling/fizzing has already started.
After 12hrs:


After 18hrs:


After drying in the sun:

And here is the total aftermath:
Leftover rust removed from the part. Some were huge layers of rust still in one piece!

The anode itself:

Anode after cleaning:

The anode itself is actually referred to as a "sacrificial anode" because it sacrifices (loses) some of it's own metal in the process. This is why it is so important not to reverse the leads or your part itself may look like this one does.
Well, that is all that there is to it. I am including a couple of links that have a little more detailed scientific info (like why NOT to use stainless steel for an anode) and pictures of larger items (car subframes) using this process.
Audi subframe thread with lots of pics: http://www.s2forum.com/forum/showthread.php?t=52199
Another great link with TONS of great info (also in pwmcguire's write-up): http://users.eastlink.ca/~pspencer/nsaeta/electrolysis.html
Now let's see some before/after pics from the GADUBS folks!
pwmcguire has already done one introduction to this process but I wanted to make a more detailed explanation. I think that everyone on here or anyone owning an old car needs to try this. It will save tons of time, energy, and money. No need to sandblast rusty parts. Simply put them in the tank and go to bed, they will be done 18-24hrs later (for most situations). Anyone can do this regardless of your level of technical knowledge or budget!
Here is a before/after scenario using a rusty brake caliper bracket from my 1988 Audi 90 Quattro:
(click all images to enlarge)
Before:

After:

Same part 18hrs later with ZERO scrubbing, no wire brush, no sandblasting... nothing.
Materials used:
• tap water
• baking soda
• battery charger (or car battery and cheap jumper cables)
• plastic tub
• old piece of steel for use as an electrode (I used a broken golf-cart leaf spring)
That's it, nothing else. The size of the part to be cleaned is only limited by the size of the imagination. As long as you can submerge the part, you can do this. I will include a link below to show this in action on a large scale.
How to:
Step #1: Find a tub/bucket large enough to totally submerge your item. Fill with water, add baking soda, and clamp the electrode to the side (so it won't fall and touch the rusty part later by accident)

Step#2:
Attach the battery charger like shown. It is VERY important not to reverse the leads or you will possibly damage the part you are trying to save. Positive goes to the steel electrode (anode) and negative goes to the part itself (cathode).

That's it! Nothing else to do but sit and wait.
Here is what mine looked like after about a minute:

You can sorta see the bubbling/fizzing has already started.
After 12hrs:


After 18hrs:


After drying in the sun:

And here is the total aftermath:
Leftover rust removed from the part. Some were huge layers of rust still in one piece!

The anode itself:

Anode after cleaning:

The anode itself is actually referred to as a "sacrificial anode" because it sacrifices (loses) some of it's own metal in the process. This is why it is so important not to reverse the leads or your part itself may look like this one does.
Well, that is all that there is to it. I am including a couple of links that have a little more detailed scientific info (like why NOT to use stainless steel for an anode) and pictures of larger items (car subframes) using this process.
Audi subframe thread with lots of pics: http://www.s2forum.com/forum/showthread.php?t=52199
Another great link with TONS of great info (also in pwmcguire's write-up): http://users.eastlink.ca/~pspencer/nsaeta/electrolysis.html
Now let's see some before/after pics from the GADUBS folks!

atye- Dub Nut
- Number of posts : 259
Age : 56
Location : Peachtree City, GA
Registration date : 2008-11-15
 Re: Rust removal by electrolysis (revisited) with detailed photos/info
After seeing how easy it was to remove the rust, I went to You Tube and found this video of how to make a fairly good sized tank.
https://www.youtube.com/watch?v=54ADeB6V1rQ
I went to Lowe's and bought all the components, now I just need to build it.
https://www.youtube.com/watch?v=54ADeB6V1rQ
I went to Lowe's and bought all the components, now I just need to build it.
 Rust removal
I just revised my posting the other day. This is a great solution to removing rust. I have spent hours with a wire wheel taking rust off. Some tips I can add is to put your parts in on Wednesday and they will be ready by Saturday. If you start on Saturday It will be ready late Sunday, maybe Monday I use a 55 gallon plastic drum to clean my Parts and several pieces of rebar suspended in it.
Last edited by pwmcguire on Wed Jan 09, 2013 6:07 pm; edited 1 time in total

pwmcguire- Complete Dub Addict
- Number of posts : 787
Age : 56
Location : Kennesaw
Registration date : 2009-08-06
 Re: Rust removal by electrolysis (revisited) with detailed photos/info
Try it on something small in the meantime and you will be blown away by the results!
PS: Great video, very clever how he uses more re-bar to enhance the process!
PS: Great video, very clever how he uses more re-bar to enhance the process!

atye- Dub Nut
- Number of posts : 259
Age : 56
Location : Peachtree City, GA
Registration date : 2008-11-15
 Re: Rust removal by electrolysis (revisited) with detailed photos/info
Awesome! I see you have your negative lead submerged along with the part and the guy in the video keeps it out. No difference I reckon?
 Re: Rust removal by electrolysis (revisited) with detailed photos/info
Tanner wrote:Awesome! I see you have your negative lead submerged along with the part and the guy in the video keeps it out. No difference I reckon?
The only difference was a little discoloration of my battery clip. I like the way he made his tub, though, with the 4 anodes around the edges. I'm gonna make me a larger tub like his for future projects.
Also, I stuck my hand in the water with the voltage running, it is not even pulling 1A and it's DC, so not quite so dangerous.


atye- Dub Nut
- Number of posts : 259
Age : 56
Location : Peachtree City, GA
Registration date : 2008-11-15
 Re: Rust removal by electrolysis (revisited) with detailed photos/info
If you have to buy rebar get a 10 ft section the small stuff is too expensive by the piece. You will have to cut it with a cutoff wheel.

pwmcguire- Complete Dub Addict
- Number of posts : 787
Age : 56
Location : Kennesaw
Registration date : 2009-08-06
 Re: Rust removal by electrolysis (revisited) with detailed photos/info
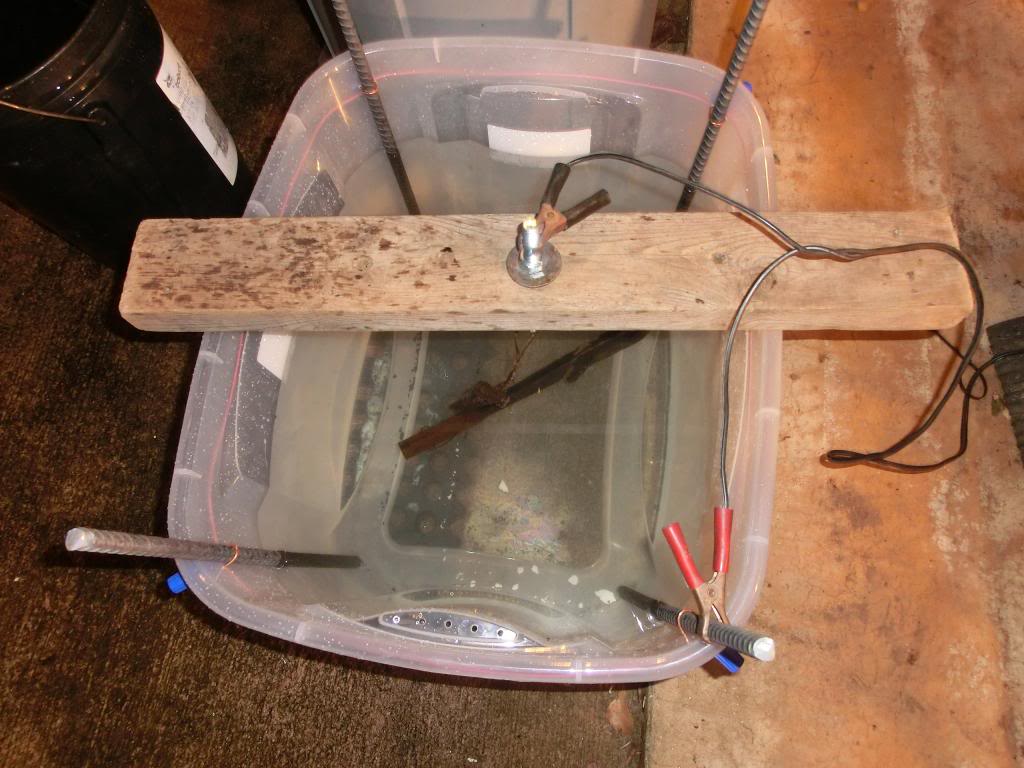
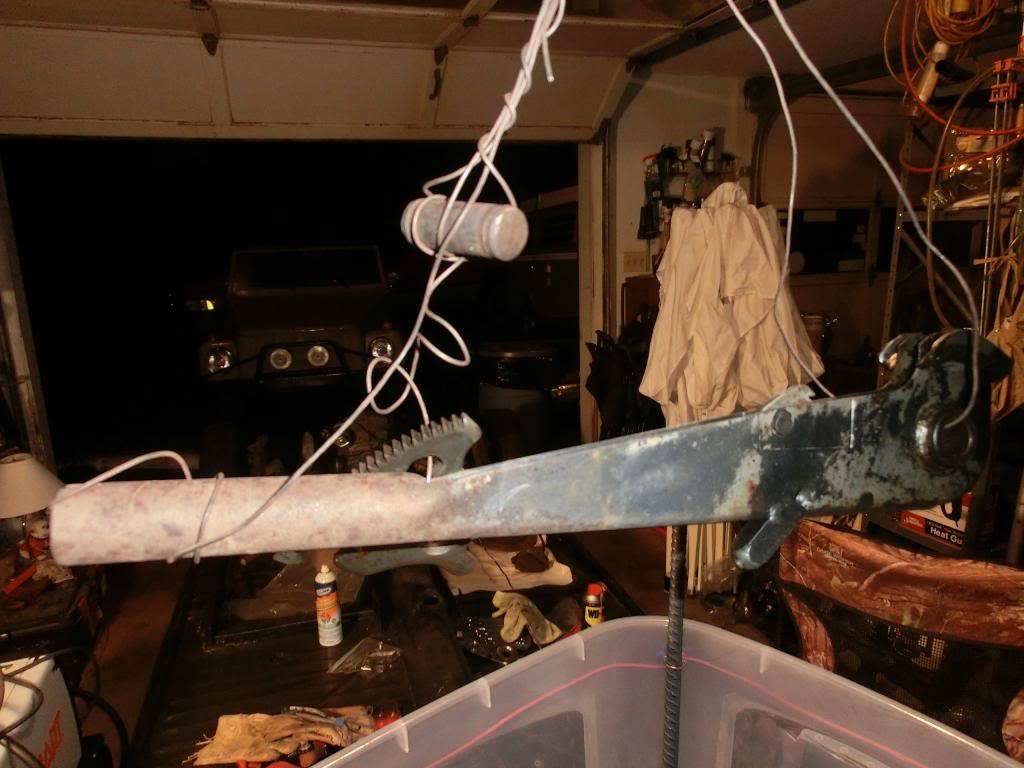
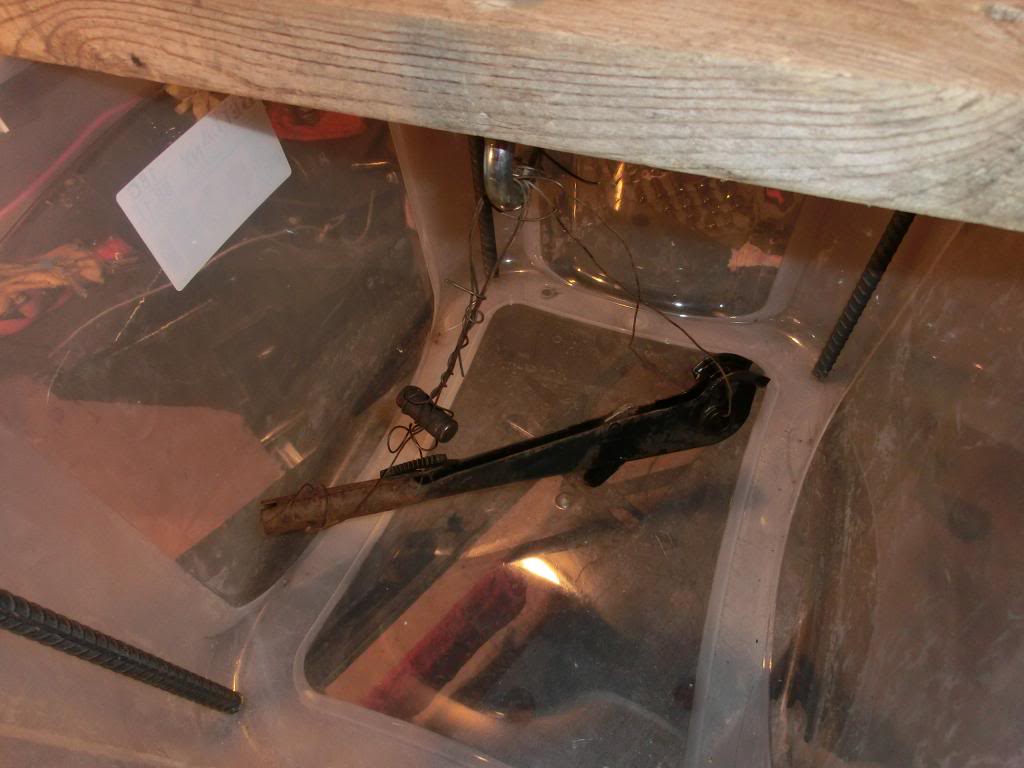
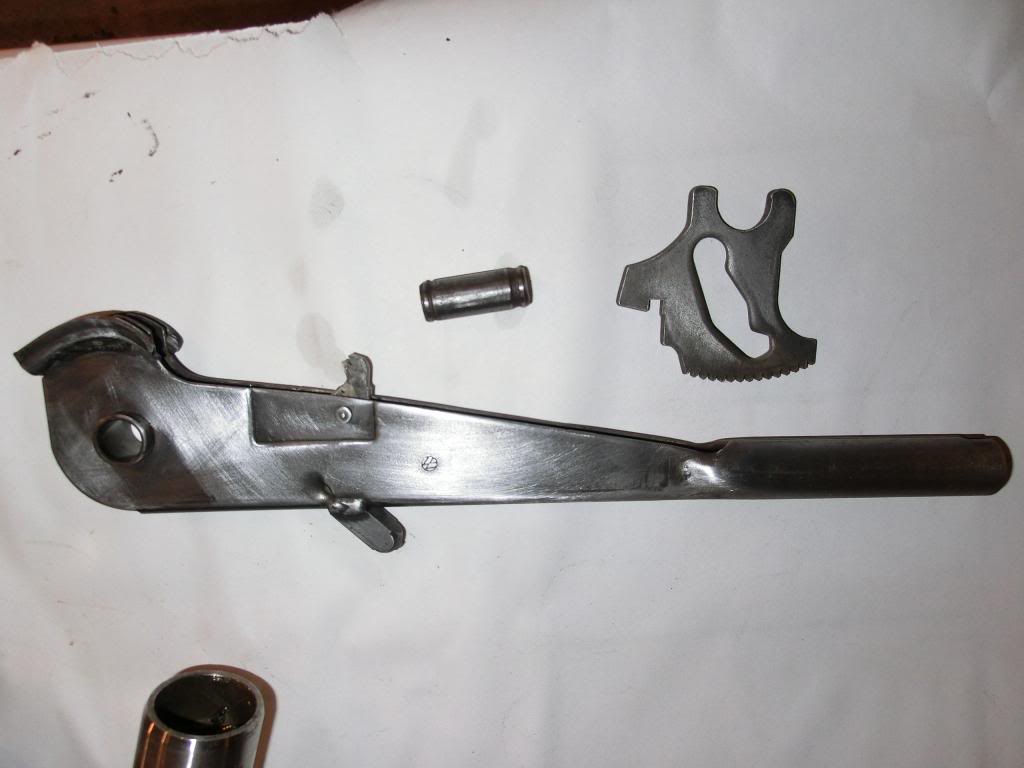
I built my electrolysis tank and it works great. I removed the rust from the e-brake handle.
Here is the tank I built.

Handle going in.
Out of the tank after spending the night bubbling away.

After a quick sanding with 320 grit.

Prime.
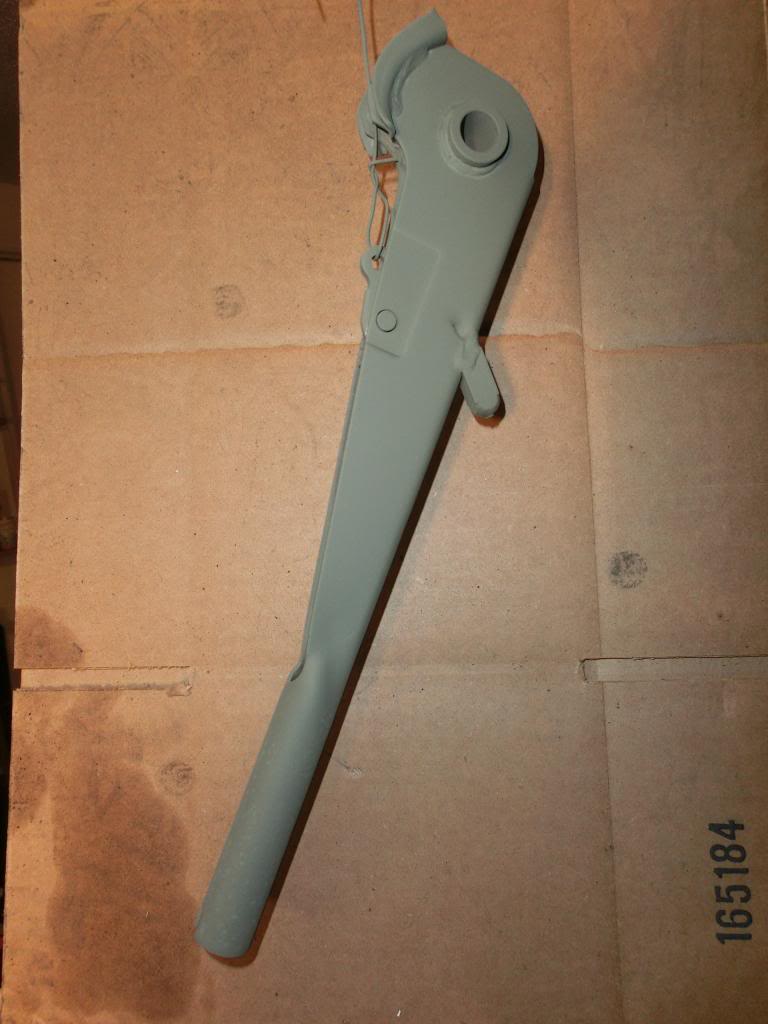
Paint.
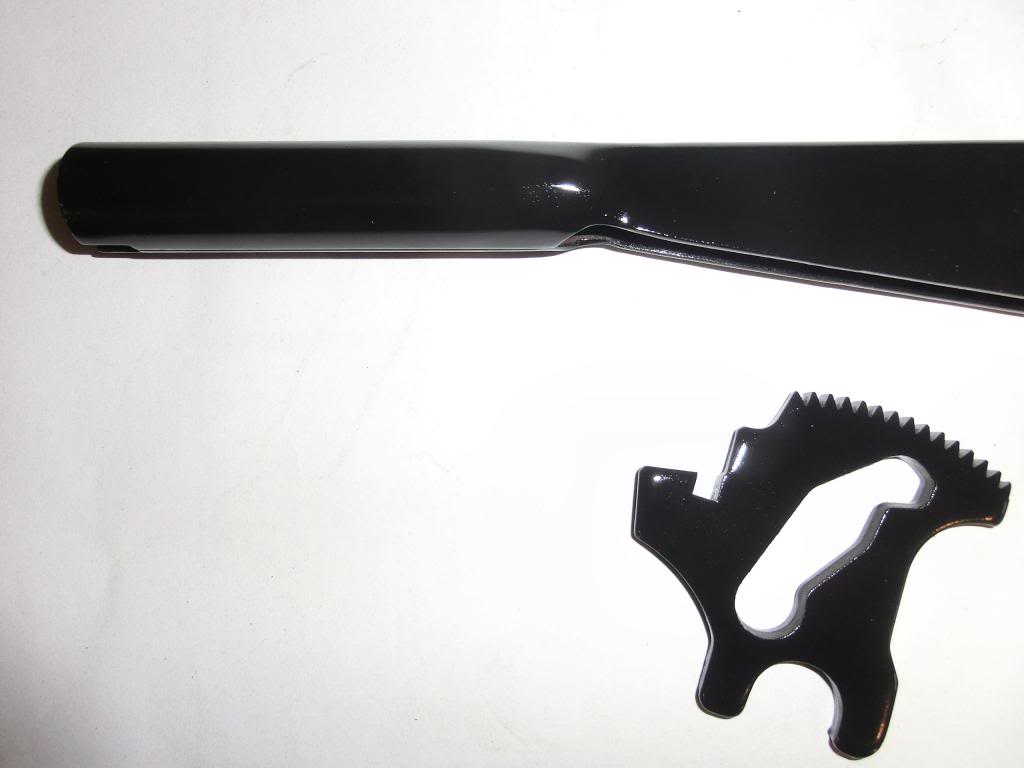
I wish I had known about this long ago. I would have saved a lot of time instead of wire brushing my life away.
Here is the tank I built.


Handle going in.


Out of the tank after spending the night bubbling away.

After a quick sanding with 320 grit.


Prime.

Paint.

I wish I had known about this long ago. I would have saved a lot of time instead of wire brushing my life away.
 Re: Rust removal by electrolysis (revisited) with detailed photos/info
Is there a limit to the size container that this will work in?
I have a storage container that is about two feet wide and three and a half feet long. As long as there are several rebars spaced along the sides I would think it will work.
Any thoughts?
I have a storage container that is about two feet wide and three and a half feet long. As long as there are several rebars spaced along the sides I would think it will work.
Any thoughts?
 Re: Rust removal by electrolysis (revisited) with detailed photos/info
No, it will work for any size container you can build to hold water

pwmcguire- Complete Dub Addict
- Number of posts : 787
Age : 56
Location : Kennesaw
Registration date : 2009-08-06
 Re: Rust removal by electrolysis (revisited) with detailed photos/info
Hobug wrote:Is there a limit to the size container that this will work in?
I have a storage container that is about two feet wide and three and a half feet long. As long as there are several rebars spaced along the sides I would think it will work.
Any thoughts?
I saw someone's thread where they put a complete frame in- they built a small swimming pool size container, and put the frame in

Grifspop- Dub God
- Number of posts : 2323
Location : Someplace you wouldn't think to look
Registration date : 2009-04-14
 Re: Rust removal by electrolysis (revisited) with detailed photos/info
That's really cool. I know someone with a swimming pool 
 Re: Rust removal by electrolysis (revisited) with detailed photos/info
Clyde !!, always thinking big. You could do a whole vw body in there 

pwmcguire- Complete Dub Addict
- Number of posts : 787
Age : 56
Location : Kennesaw
Registration date : 2009-08-06
 Re: Rust removal by electrolysis (revisited) with detailed photos/info
Clyde wrote:That's really cool. I know someone with a swimming pool
Lets try it!
 need a BIG tank
[img] [/img] NEED THIS RACK DONE. some one build a BIG tank.
 [/img] NEED THIS RACK DONE. some one build a BIG tank.
bulldawgdude- Dub Nut
- Number of posts : 269
Location : Juliette , GA
Registration date : 2011-03-30

bulldawgdude- Dub Nut
- Number of posts : 269
Location : Juliette , GA
Registration date : 2011-03-30
 Re: Rust removal by electrolysis (revisited) with detailed photos/info
I've been setting the battery charger on 2 amps and on light rust it is fine, but on heavier rust what happens if I set it on 10 amps?
That's right, this thing has spoiled me and I want it too do ALL the work. So, is 10 amps too much?
That's right, this thing has spoiled me
 Re: Rust removal by electrolysis (revisited) with detailed photos/info
If you look online 2 amps is plenty, keep your electrodes clean and more of them

pwmcguire- Complete Dub Addict
- Number of posts : 787
Age : 56
Location : Kennesaw
Registration date : 2009-08-06
 Re: Rust removal by electrolysis (revisited) with detailed photos/info
pwmcguire wrote:If you look online 2 amps is plenty, keep your electrodes clean and more of them
I clean electrodes each time, but maybe I need more than four. Thanks Pat.
 Re: Rust removal by electrolysis (revisited) with detailed photos/info
any risk of shock using this method? also looked up molasses and water takes rust off in two to 3 days anyone tried that? im tired of blowingg the rust boogies plus i can do something while waiting wish they wouldnt have busted up the inground pool that was at my house knew it would come in use

bayboy87- Dub Nut
- Number of posts : 246
Age : 37
Location : jones county
Registration date : 2012-09-16
 Re: Rust removal by electrolysis (revisited) with detailed photos/info
How much baking soda do you guys put in when you do it?

dlandvw3- Dub Nut
- Number of posts : 479
Location : Warner Robins, GA
Registration date : 2008-09-08
 Re: Rust removal by electrolysis (revisited) with detailed photos/info
dlandvw3 wrote:How much baking soda do you guys put in when you do it?
Mix a solution of 5 gallons water to 1/3 to 1/2 cup laundry soda, by the way it's washing soda.

pwmcguire- Complete Dub Addict
- Number of posts : 787
Age : 56
Location : Kennesaw
Registration date : 2009-08-06
 Re: Rust removal by electrolysis (revisited) with detailed photos/info
this methed also works on engine blocks and heads quite well. it makes your engine block much easier to paint without the risk of sandblasting grit getting into the engines oil channels. obviously im not talking about VW engines because they are aluminum and therefore dont rust. but it works well on iron engne blocks and heads.
m1auto- Dub Noob
- Number of posts : 32
Age : 30
Location : california
Registration date : 2012-10-13
 Re: Rust removal by electrolysis (revisited) with detailed photos/info
Easter bunny brought me parts to build one 
You can get a plastic kiddie pool for around $5 to use. They'll all go on sale at the beginning of summer.bulldawgdude wrote: NEED THIS RACK DONE. some one build a BIG tank.
Page 1 of 1
Permissions in this forum:
You cannot reply to topics in this forum
 [/img]