Bus Rear Hatch Spring/Hinge Removal
3 posters
Page 1 of 1
 Bus Rear Hatch Spring/Hinge Removal
I have read a lot of these threads on the subject of the rear hatch spring threat. And honestly the info is lacking. Telling me to wear body armor does not help me get the darn thing off.
So today I had to tackle this issue on my '70 Bus.
I have a '71 Bus that is now the parts bus so I wanted to see exactly how much load or twist there is on the spring. So I made a mark center line on the rod so when I cut the rod and remove it, I can then line up the mark and determine the degree of twist. Knowing this will give me an idea on how to remove my good rod. I used a cut blade in my grinder and I only got half way through the rod and it snapped right off. I held the two rods when doing this, I was wishing I had that body armor of this step but the only thing I had was my welding glove, it's pretty thick. I didn't know what was going to happen but it snapped and just twisted in my hand. This step was just to see what I was dealing with in terms of distance or twist on the rod.
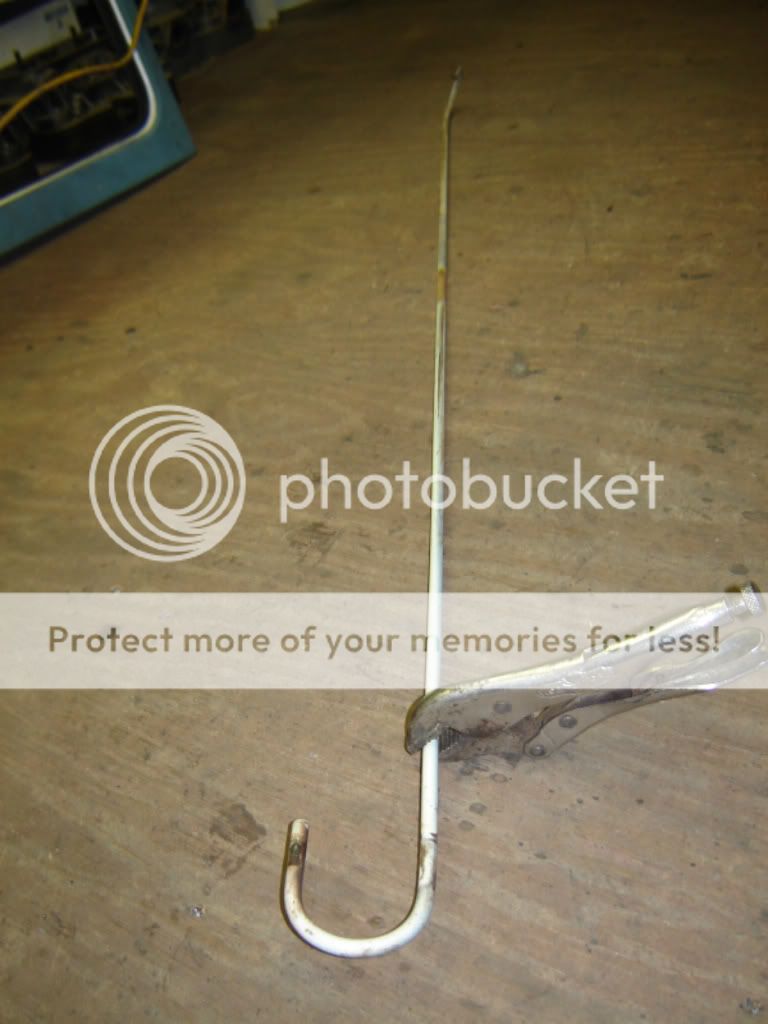
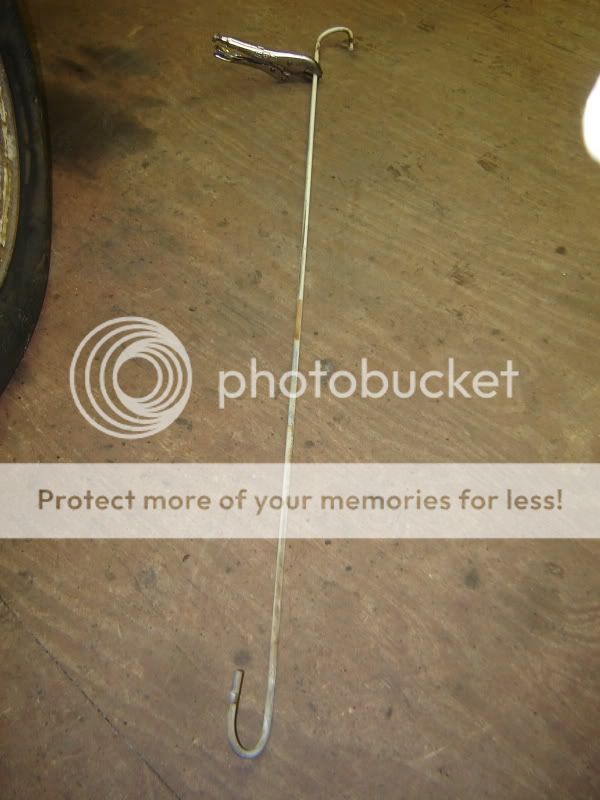
This is the rod removed from the parts Bus, the vise grip is just holding it in position with my marks lined up.
You can see that the rod has about a 3rd turn loaded when it is installed.


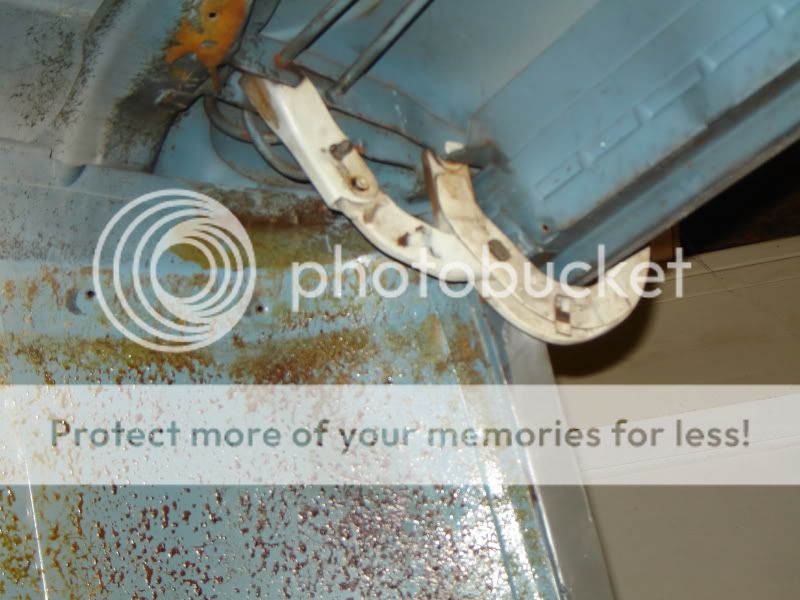
So onto the real thing. Here is what my hinge looked like....

Looks like when the hatch was opened they just let it go and it eventually damaged the hinge ass'y.

So I didn't take pics of the process of removing my good rod but I tied a rope around both the rods near the end I need to remove. Tie it tight, pulling them together a bit. I used a 1/2" rope. Then wrapped it just to be on the safe side. Secure the loose end, I clamped it to the frame underneath the Bus with a Vise Grip. I also had removed the hinge pieces so just the upper arm is left.
Once that was done, standing on the side of the Bus my arm through the side window opening, I knocked the rod out of the cradle. It uncoiled but the rope will keep it from flying off through the shop. I then removed the rope and removed the upper arm from the rod. I then reinstalled the new upper arm in preparation for the reinstall.
I thought putting it back on would be a task but it went on really easy. I used a large screw driver (about 18" long) placed in the middle of the upper arm pulling down and supporting the rod with my left hand. A few adjustments were needed to line up the upper arm with the cradle but once I had it lined up, twist it and place it right in the cradle and gently release the tension on the screw driver. I had to use another driver to pry the upper arm down a bit to remove my large screw driver from the arm. After that just reinstall the other arms, pins and clips and you're done.
No Body Armor needed!
Finished, You can see the replacement hinge here in place.

I'm so glad to have this behind me I was really worried about this process but I've done it and it's not that bad but do be safe a 3rd turn on that rod is a lot of tension and I see how it could do a lot of damage. I wish I had more pics of the steps but you get the idea I hope.
So today I had to tackle this issue on my '70 Bus.
I have a '71 Bus that is now the parts bus so I wanted to see exactly how much load or twist there is on the spring. So I made a mark center line on the rod so when I cut the rod and remove it, I can then line up the mark and determine the degree of twist. Knowing this will give me an idea on how to remove my good rod. I used a cut blade in my grinder and I only got half way through the rod and it snapped right off. I held the two rods when doing this, I was wishing I had that body armor of this step but the only thing I had was my welding glove, it's pretty thick. I didn't know what was going to happen but it snapped and just twisted in my hand. This step was just to see what I was dealing with in terms of distance or twist on the rod.
This is the rod removed from the parts Bus, the vise grip is just holding it in position with my marks lined up.
You can see that the rod has about a 3rd turn loaded when it is installed.


So onto the real thing. Here is what my hinge looked like....

Looks like when the hatch was opened they just let it go and it eventually damaged the hinge ass'y.

So I didn't take pics of the process of removing my good rod but I tied a rope around both the rods near the end I need to remove. Tie it tight, pulling them together a bit. I used a 1/2" rope. Then wrapped it just to be on the safe side. Secure the loose end, I clamped it to the frame underneath the Bus with a Vise Grip. I also had removed the hinge pieces so just the upper arm is left.
Once that was done, standing on the side of the Bus my arm through the side window opening, I knocked the rod out of the cradle. It uncoiled but the rope will keep it from flying off through the shop. I then removed the rope and removed the upper arm from the rod. I then reinstalled the new upper arm in preparation for the reinstall.
I thought putting it back on would be a task but it went on really easy. I used a large screw driver (about 18" long) placed in the middle of the upper arm pulling down and supporting the rod with my left hand. A few adjustments were needed to line up the upper arm with the cradle but once I had it lined up, twist it and place it right in the cradle and gently release the tension on the screw driver. I had to use another driver to pry the upper arm down a bit to remove my large screw driver from the arm. After that just reinstall the other arms, pins and clips and you're done.
No Body Armor needed!
Finished, You can see the replacement hinge here in place.

I'm so glad to have this behind me I was really worried about this process but I've done it and it's not that bad but do be safe a 3rd turn on that rod is a lot of tension and I see how it could do a lot of damage. I wish I had more pics of the steps but you get the idea I hope.
 Re: Bus Rear Hatch Spring/Hinge Removal
Good job Bob. Glad you still have all your fingers! I was just reading about these tension rods the other day. Found a good "how to" from a type 3 manual (basically the same set-up) here.
http://home.clara.net/hallvw/technical/tailgate.htm
Also found a diagram of the factory tool with dimensions if you wanted to make your own. Go to #709
http://www.thesamba.com/vw/archives/info/tools8.php
Somebody else in another post had also made a simpler version of the tool out of an old jack handle and had good results with it.


fluxcap- Dub Lieutenant General
- Number of posts : 3857
Location : Newnan, GA
Registration date : 2008-07-20
 Re: Bus Rear Hatch Spring/Hinge Removal
Yeah I almost made something close to that. Most of the Samba post kept saying be careful but never would give any tips on how to do it. I posted the same thread over on the samba. I did see one post that referred us to a guide like the Type 3 one you posted but it was for a Bus.
I wanted to see what I was dealing with on the rod tension so I cut one off the '71 just to see.
I wanted to see what I was dealing with on the rod tension so I cut one off the '71 just to see.
 Re: Bus Rear Hatch Spring/Hinge Removal
I'm hoping not to have to mess with mine. I'll be calling you over if I do! 

fluxcap- Dub Lieutenant General
- Number of posts : 3857
Location : Newnan, GA
Registration date : 2008-07-20
 Re: Bus Rear Hatch Spring/Hinge Removal
With any luck, you won't have to change that thing for another 42 years.

bumblebuggy- Out of Control Dubber
- Number of posts : 1921
Location : McDonough
Registration date : 2008-07-24
 Re: Bus Rear Hatch Spring/Hinge Removal
They contain bushings in there and those can be checked and replaced without removing the spring. As long as the not bushed arms are not wallowed out you're good for another 42yrs as Glenn stated.
 Similar topics
» Door hinge removal tool for the Club
» Rear Hatch Glass
» DECK Lid Removal
» Door hinge bolts
» Door Removal
» Rear Hatch Glass
» DECK Lid Removal
» Door hinge bolts
» Door Removal
Page 1 of 1
Permissions in this forum:
You cannot reply to topics in this forum